Made it through the first week! Thanks everyone for spreading the word and for all the great feedback…and if you’re in New York, stop by on Saturday night for the Hobotech 1yr Anniversary party and say hello!
If you’re using MIDI controllers with Live, you’ve got to be a Master of the MIDI preference screen. Today we’ll review most of it, starting from the top.

The six rows of menus at the top are for Instant Mappings only (Live decides how your controller controls the software automatically). If you’re manually mapping your devices, you can skip this section. If you’re using the APC40 or the Launchpad, you have to set it up in this section in order for the clip grid to work.
To set up instant mappings, find your MIDI device in the Control Surface menu. Once you’ve picked it, Live will usually be able to guess the ports for the Input and Output menus. Once all three of these menus are set, Live will automatically respond to your MIDI controller. But how? Exactly what will it respond to? Check out the device reference if you’re not sure:
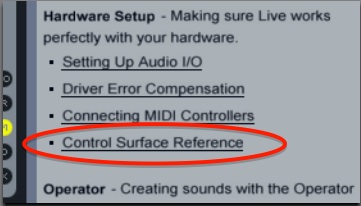
Open the Help View (from the Help menu), click on the link that says “view the full list of Ableton Lessons” then, on the next page choose Control Surface Reference.*
Next in the MIDI preferences is Takeover Mode, which specifies how Live should deal with your controller being out of sync with Live (for example, you’ve used the mouse to pull a fader down, but the fader on your controller is still turned up). If you’re not already familiar with this issue, set it to None. This mode changes Live to match the state of the controller the instant a control on your MIDI hardware is moved. It can be clunky, but it always makes sense. I’ll leave you to do some experimenting with this and read up on the other two modes yourself.
![]()
The bottom half of the screen is for manually setting up MIDI devices. It displays one row for every MIDI port connected to your computer. For most USB MIDI controllers it shows two rows – one port for inputting MIDI data into Live, one for outputting data from Live to the controller. You’ll also come across controllers that appear as more than two ports. Reasons for this vary – read up on it in the controller’s manual.
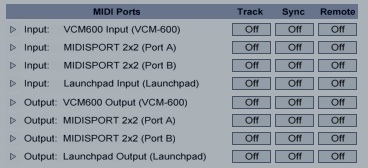
Track Input is for devices that you will be using to record MIDI clips, such as keyboards and drum pads.
Remote Input is for devices that will be for Remote Control – manipulating Live’s on screen controls.
Setting up the outputs isn’t always necessary. It depends on your hardware and what you are doing with it.
Track Output is for sequencing hardware synthesizers and such. If you don’t have these, you probably won’t use it.
Remote Output is for MIDI controllers that support feedback. For example, some MIDI controllers have knobs with a ring of LEDs around them to indicate the position of the knob. With Remote output turned on, Live can update the MIDI controller if you move an onscreen control with the mouse, and keep the hardware and software in sync no matter what.
There’s lots more to discuss here, such as using a device with both instant mappings and manual mappings (hint: it’s awesome), and the use of Sync (hint: it’s not). We’ll return to these another day.
* After writing this, I discovered that the Control Surface Reference link is broken on my machine. I’m looking into it. Feel free to drop a line to livetips@heatercore.net about this or anything else…


